Unleashing Creativity: Conquering the Reaper Bones Skeleton Miniature in My Second Painting Attempt
- Peter Demos
- Jan 21, 2025
- 3 min read
Updated: Jan 25, 2025
This is my second attempt at painting a miniature. I was painting Reaper Bones skeleton miniature. I ordered a Learn to Paint Kit from Amazon (link). It's the Reaper Bones Learn to Paint Kit: Core Skills. It comes with three models, the paints you need, a couple of brushes, and a booklet with the instructions you will need. In the booklet, they give you detailed instructions on how to basecoat, wash, and dry brush the first miniature. Then, for the second two, they just give you the colors and timing, but you can refer to the details on the first if you forget how to do it on either of the following ones.
The models are a skeleton, an orc, and a knight. They seemed pretty good quality. The brushes also seem fairly decent quality for what you are paying for the set. It did seem that once I dry brushed the first model with the bigger of the two brushes they sent, it was not really the same anymore. I will likely use that brush for dry brushing in the future.
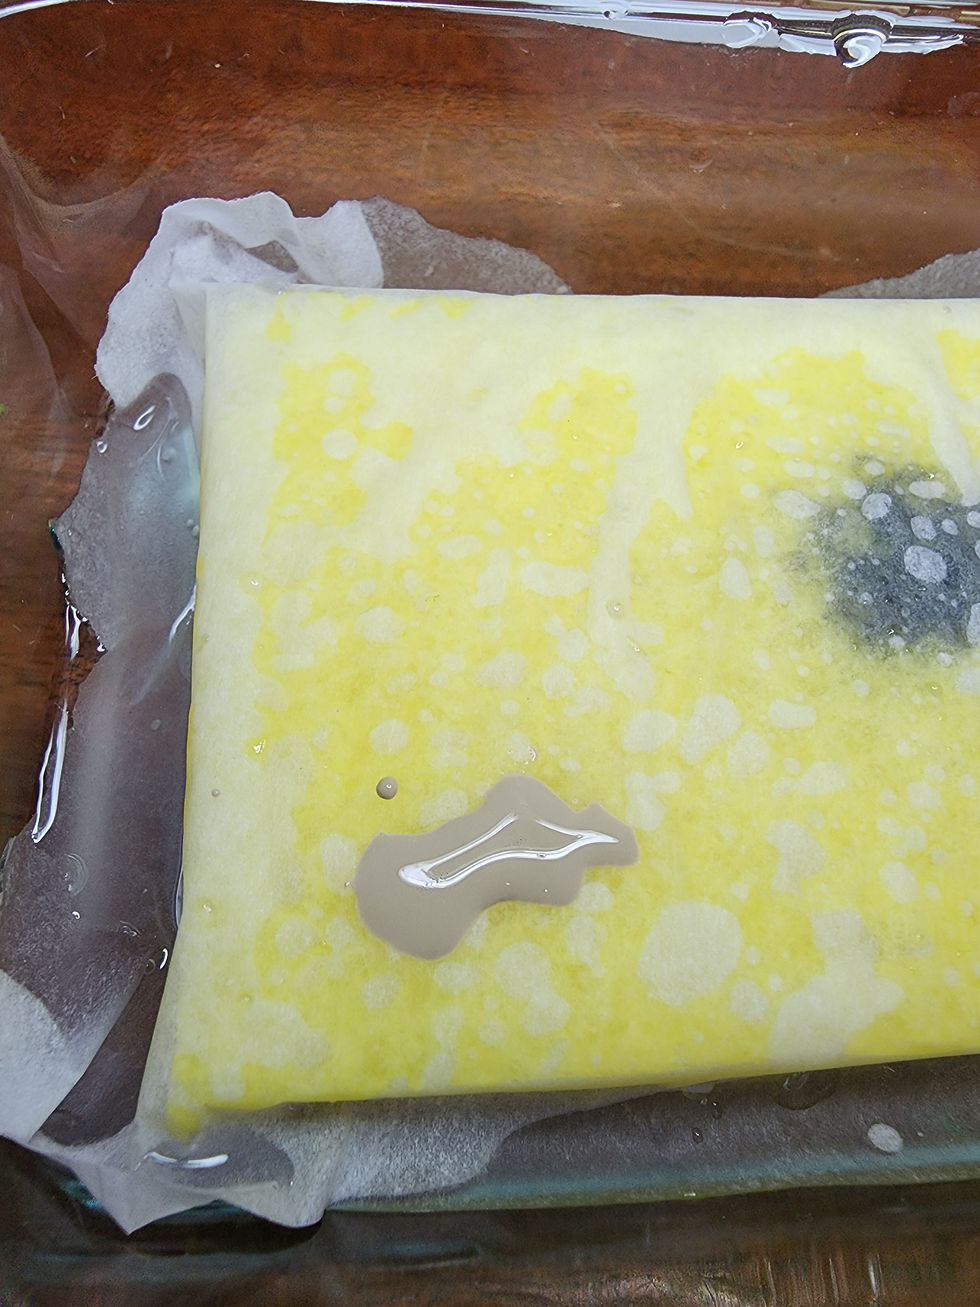
However, I encountered some issues with the paints, especially the lighter ones used for the first miniature. It seemed like the pigment had separated from the fluid, which caused me to struggle and get frustrated with the first one. As I moved to other miniatures in the set and used darker colors, the problems seemed to go away.
This is a photo of what I pulled out of the bottle after having troubles getting the paint to come out. I'm not exactly sure what the issue is, but it feels like the pigment separated.

I took this next picture of the paint because it felt very liquidy and runny on my palette. Overall, with this first set of paints, I had a really hard time. Later on, with other paints in this set, I did not have this issue. So maybe it was just bad luck. I'm not sure. I don't know enough about paints currently to diagnose it.

I started with the first model, the skeleton. The booklet states that you don't need to prime the models as they are ready to paint straight out of the box. So, I went straight to painting. The skeleton requires four colors, starting with the base color shown in the pictures above. Unfortunately, working with that paint was a nightmare. It was super thin and wouldn't adhere to the model at all. It felt like the pigment had separated, making it more like colored water than paint. As a result, the paint only stuck in the crevices. This was incredibly frustrating, and I didn't take many pictures during the process.
Here is what the skeleton looked like after me fighting the basecoat for a while:

After finishing the basecoat on the model, you dry brush it with a lighter color. The dry brush went a bit better and made it look a little better. There was still a bunch of grey showing at this point, and I was kind of over the process from fighting the base color that I just wanted to get done. From here, you do the detail work like painting the wood of the bow, leather, and some metal on the bow. These paints performed much better, with the exception of the light blue for the feathers on the arrows. It was watery as well.
Here is what the final product looked like:


You can probably see on the skeleton's legs some different colors, and it's from me pulling some different colors I would use later on to see if I was going to have the same issue with the paint or if it was just this particular color.
Overall, painting the skeleton was a huge pain because of the problems I had with some of the paints. If I could go back, I would have just made a call and swapped to a different color. I was super frustrated and had to take some time off after painting this one.


Comments